Monday, August 31, 2009

Find Out Why Stainmaster Carpet Is Your Best Choice

by: John Murray

If you are in the market for new carpet chances are you have plenty of questions about which manufacturers are best, which carpets have the best warranties, what to look for when buying carpet, and the list goes on. Of course there are several excellent carpet manufacturers but one that really stands out is Stainmaster Carpet. Find out why Stainmaster carpet is your best choice.

Stainmaster carpet offers it all. Exceptional service and a first class product with plenty of styles to choose from, and a superb warranty.

Stainmaster is known as an industry leader when it comes to innovation and carpet fashions. They've got hundreds of colors and styles to choose from. They're very proud of their latest member to the family the Tactesse nylon fiber line which is even more luxurious than wool.

Stainmaster is very proud of the carpet construction which is second to none. They use bulked continuous filament which means that the yarn is formed from continuous strands of nylon which is textured to create a fuller rug as well as provide curled fiber as well as straight.

Each carpet fiber is then wrapped to provide a tighter twist and a more resilient carpet. It also resists crushing from footprints, matting, and texture change.

After the fiber is twisted it is then treated with a heat system to lock the twist into place. This means your carpet is less likely to snag and unravel or crush from heavy traffic.

After the fiber has been heat treated it is thread onto large carpet needles and then stitched to the backing. How dense the carpet becomes is determined by the amount of yarn that is used.

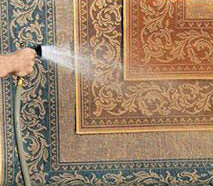
It is then saturated in a liquid dye solution followed by a solution that sets the color, then it is dried. Finally it is saturated with the stain guard solution and it is once again dried. Finally it is coated with Stainmaster's unique Teflon® solution. The end result is a carpet that's gorgeous, able to repel stains, and dirt, and will last a long time.

Stainmaster Carpet offers a variety of styles. The Cultured Beauty Line is their most popular line offering a warranty that guarantees it won't wear more than 10% in ten years during normal home use. It also has been engineered to retain its texture and not flatten down. The stain guard guarantees against most household type stains for a seven year period and it's also guaranteed to not change color due to soil for a seven year period. It even has an anti static warranty.

Some of the most popular carpet styles in the cultured beauty line are beach comber, birch bark, champagne bubbles, chenille white, and ice crystal. In their vibrant colors there is earth violet, crab apple, faded denim, nocturne, ocean reef, confetti pink, and a host of other choices.

Four very other popular styles are the 352 Rhett, 353 Scarlet, 358 Romeo, and 359 Juliet all with the Teflon solution, the wear warranty, stain and soil warranty. These four lines are rich and plush providing a full bodied carpet in a wide range of fashionable colors. Durable and beautiful all in one!

Carpet is a big investment so be sure you check out Stainmaster Carpet and see what they can offer you!

About The Author

John Murray makes it easy to go through the carpet buying process and provides tips to keep your carpet lasting long. To learn more and receive your free mini-course visit: http://www.carpets-guide.com.

Improving your home and your life only at Home Improvement Idea : http://home-improvement-idea.blogspot.com

Sunday, August 30, 2009

Save Money and Buy Wholesale Carpet

by: John Murray

If you are in the market for some new carpets you are probably already aware of how costly that can be. There are many ways you can get better pricing for your carpet such as buying remnants or flawed carpet. But why not save money and buy wholesale carpet? Yes even you as a consumer can buy wholesale carpet.

Many people hear the word wholesale and believe they must be a business, dealer, or high volume purchaser to get wholesale pricing. That's simply not true. There are various types of wholesale carpet plans around. You just need to find the one that works for your situation.

Carpet Wholesale Distributors have low overhead and great buying potential. You'll not find any store fronts here, just a basic large warehouse, lots of concrete, and lots of carpet. This type of carpet wholesaler is in business to supply carpet to carpet retailers. They may also deal with large corporate clients that buy large volumes of carpets. For instance developers of condos, home builders, or commercial office builders. There pricing is competitive and their goal is for there to be enough room for the retailer to add their mark up and still be competitive. They are quick to deliver their product.

Wholesale carpet retailers are open to the general public. Yes this means you! You can safe a substantial amount by buying your carpet from wholesale carpet retailers. Besides the savings there are other benefits like quick delivery and installation. You'll save both time and money.

There are a couple of reasons why these retailers can offer carpets at wholesale pricing while other retailers cannot. They have massive buying power so they order large volume and obtain the maximum discounts from the supplier.

You'll not find fancy show rooms, snazzy lighting, or any other cosmetic perks. What you'll find is a big concrete warehouse with rolls and rolls of carpet. This reduces their overhead dramatically

Most of these operations are looking to move volume at a reduced price so they are willing to work on a much smaller profit margin.

They purchase seconds and thirds meaning they have imperfections. These imperfections can be small or large. They might be a dye lot that was off, snags or runs, or a host of other items.

When buying from a wholesale carpet retailer you'll want to find out the answers to these questions.

Make sure you understand the warranty and whether any warranty claims will be dealt with at the wholesaler level or whether you'll need to deal with the manufacturer of the carpet.

You'll also want to know if the carpet you are buying are seconds, Normally too small to notice but you'll need to make sure. The last thing you need is a nice long line of missed looping that runs right through the center of the carpet. Just be sure to have a really good look if you are buying seconds. You'll also want to find out if the manufacturers warranty is still valid.

Remember if a deal sounds to good to be true, 99.9% of the time it is. So if the price is just to good find out what's wrong with the product before you jump the gun and spend your money on an unsatisfactory product.

Make sure you get your pricing with underlay and installation. No sense in getting cheap carpet if they soak it to you on the underlay or install. So be sure to get a full package price.

Buying wholesale carpet can save you a ton of money. So if you don't care if there's a fancy show room, and you don't need someone to hold your hand while you pick out your carpet, and you just care about basic service this is a doable option. So remember save money and buy wholesale carpet! Think of all the money you'll have left for other home decor projects.

About The Author

John Murray makes it easy to go through the carpet buying process and provides tips to keep your carpet lasting long. To learn more and receive your free mini-course visit: http://www.carpets-guide.com.

Improving your home and your life only at Home Improvement Idea : http://home-improvement-idea.blogspot.com

Saturday, August 29, 2009

Find The Top 8 Carpet Extractors

by: John Murray

Carpet extractors are an excellent method of basic economical in depth carpet cleaning. Carpet extractors will clean your entire carpet, remove spots and stains, keep high traffic areas clean, and they'll even clean your upholstery and drapery. Here are the top 8 carpet extractors.
1. Dirtdevil Featherlight Carpet Extractor

The dirtdevel featherlight is a lightweight and very portable carpet extractor. Comes with a 5 brush nozzle system which will gently clean your carpets and the powerful vacuum will dry the carpets quickly. It has a 1 gallon reservoir for your cleaning solution, and a nice wide nozzle.
2. AX9 Carpet Extractor

The AX9 is designed to clean almost any surface no matter how tough the access it will get into those tight crevices. That's because it comes with a complete set of accessories to make the job easy. It provides total dryness with only one sweep. Complete with an ergonomic handle that makes moving it around more comfortable.
3. EAG 1400

The EAG 1400 is a commercial size carpet extractor that will clean up your commercial or home space. Built much like a wet/dry vac it has a dual two stage vacuum motor that provides maximum power. It has a 12 gallon solution tank as well as a 12 gallon recovery tank. The 8 large castor rear wheels, and 3 front castors make it easy to maneuver. It has a 25 foot cord so will reach and a 15 foot vacuum hose.
4. Admiral 8

The Admiral 8 comes with an ergonomic and adjustable handle with finger tip controls for operation. This no hose design makes it easy to fill and empty. It can also be purchased with the hard floor cleaning kit.
5. Ext 311 Extractor

The Ext 311 has a nice compact carpet extractor that pulls soil from the carpet effectively. The 2 stage vacuum motor, 10 foot hose, and a 9 inch and 10 inch heavy duty tool will clean any carpet easily. It has an 11 gallon solution tank and recover bucket can be removed to empty. Easy to roll along on the 2 inch casters.

6. The Speedster Carpet Extractor

The Speedster comes with 100 PSI solution pump and dual two stage vacuum motors that have a 150 degree water lift. The large rear wheels and grip handle makes this extractor easy to maneuver and move around.

7. Clean NB 48 Carpet Extractor

The NB 48 is complete with heat to dry up behind you. This commercial carpet extractor is one of the best sellers for professionals. 10 foot wand, 20 foot hose.

8. Harding 1408 Carpet Extractor

The Harding 1408 has a forward reverse brush action which gets down deep and takes less time to clean. It has an 8 gallon solution and recovery bladder as well as two sets of spray nozzles which work independently, and a 14 inch shoe. All lines are built inside so there are no outside lines. Comes complete with 40 foot chord.

These are 8 top carpet extractors but there are many many other excellent products on the market. The carpet extractor you choose will depend on how much carpet you have to clean, and how often. The one thing that has been proven over and over is that carpet extractors will extend the life of your carpets and keep them looking fresh and new.

About The Author

John Murray makes it easy to go through the carpet buying process and provides tips to keep your carpet lasting long. To learn more and receive your free mini-course visit: http://www.carpets-guide.com.

Improving your home and your life only at Home Improvement Idea : http://home-improvement-idea.blogspot.com

Friday, August 28, 2009

How To Clean Your Throw Rugs

by: John Murray

Throw rugs are a handy way to cover wear, spruce up a room, or add warmth and comfort to hardwood floors. They are affordable and easy to find and you can choose from all types of patterns, designs, colors, and materials. Here's how to clean your throw rugs and keep them looking fresh and new.

Throw rugs are very easy to care for. They require no special treatment or attention, unless of course you've purchased wool rugs or the manufacturers instructions give you specific directions for cleaning.

1. Vacuum

The single easiest way to keep your rugs looking fresh and new and extend their life is to vacuum them on a regular basis. Vacuuming pulls dirt away so it cannot get pushed deep into the fiber and wear the rug.

2. Check Tag

Read the tag for any special washing instructions. If you find none you can assume that our instructions will work.

3. Pretreat

If your throw rug has any stains pretreat it with any of the laundry stain removers or pretreatments available. Apply as you would with any other item. Then let soak for a few hours so that it can penetrate deep into the fiber.

4. Wash

Toss it in the washing machine in cold water. Use a mild laundry detergent and be sure it does not have any bleaching agents. These could fade the color of your rug. Even the bleach free ones can be harsh on some fabrics and are not recommended for your throw rugs if you want to keep the new looking. If your rug is too large for your washer locate a laundry mat that has the commercial size washers then take it there to wash.

5. Hang to Dry

Never throw your throw rug in the dryer. Always hang to dry. Hanging over the shower door works great as any water left in the material will drip into the shower. You can also hang over any other style of door, or lay flat to dry. If you lay flat to dry be sure to flip and move regularly otherwise the water will be wicked into the surface and it will take forever to dry.

6. Brush

Not only do you have to brush your pets, now you have to brush your rugs. Once your throw rug is dry take a comb or brush and gently work it through the rug brushing against it's natural grain so it becomes full again.

A quick search online will reveal there are thousands of throw rug choices out there. You can also buy throw rugs at local carpet dealers. Stores like Walmart or Target offer some great prices on these style of rugs so be sure to check them out too!

Throw rugs are the perfect way to add to your home decor. As you can see from how to clean your throw rugs process they are not difficult to maintain. There also great because normally they are of a small to medium size so you can mix it up every now and then and rearrange them in your home.

Improving your home and your life only at Home Improvement Idea : http://home-improvement-idea.blogspot.com

Thursday, August 27, 2009

How To Install Outdoor Carpet

by: John Murray

Remember the 1970s when the only choice available in indoor - outdoor carpet was that wonderful [not] golf course green turf. It's no wonder that the word outdoor carpet sends shudders down a person's spine. But those days are gone.

Today there are a wide selection of both colors and textures from the very plush to the basic. You can even choose varying grades of carpet. So all that's left to know is how to install outdoor carpet.

Before we get into how to install outdoor carpet let's have a look at the tools you'll need. 50 lb Carpet Roller - optional but well worth the rental fee because of the nice tight seal it provides.

- Utility Knife - make sure the blade is sharp


- Straight Edge


- Adhesive Spreader


- Scissors


- Tape Measure

You will require the following materials

- Double faced carpet tape


- Adhesive


- Adhesive solvent [mild]


- Seam Adhesive


- Solvent To Ensure The Surface is Clean

Some things you should be aware of.

- If you are buying outdoor carpet that is going to be prone to dampness or serious wetness be sure the carpet has an all weather marine backing that is resistant to moisture.

- Outdoor carpet can be purchased in either 6 foot or 12 foot widths.

- Sundecks or areas that get a large amount of sun should be installed using a quality outdoor carpet adhesive to ensure there are no problems with rot or mildew.

- Adhesives are flammable so do not use around open flames, cigarettes, pilot lights, or any other source of flame.

Now to the main attraction, how to install outdoor carpet

1. Prepare your surface

Make sure you have properly prepared your surface by using a solvent to remove all grime and dirt. Let it dry out completely before installing the carpet. The best conditions for installing your carpet are in a humidity range from 10% to 65%, and temperatures between 55 F and 95 F.

2. Unroll

Unroll the carpet in the location where you are going to install it. Let is sit for an hour or two to allow for expansion.

3. Tape room

Take your two sided double tape and place the tape around the outer edge of the room on the sub floor. Make sure there is no more than a 2 foot spacing between each strip of tape. Leave the protective paper on the top side of the tape so as not to loose the adhesion.

4. Center It

Next center the carpet in the room. Position it so the edges are able to curl up against the wall. Allow at least 3" on each side. You can trim excess away later.

5. Cut A Ways

Trim around protrusion and outside corner edges by making a vertical slice down the carpet. Remember cutting a corner correctly makes installing your carpet much easier.

6. Inside Corners

To fit your carpet on inside corners you need to do a V cut where it over laps. Move slow and carefully when making these cuts so that you do not cut too far.

7. Seams

If your room needs to be seamed be sure you have the pile running in the same direction so that the seam is the least noticeable. You should overlap from 2 to 3 inches.

To make a double cut seam take your straight edge and utility knife and cut through both layers at exactly the same time using the tools together.

8. Wall To Center

Start against the wall and then fold the carpet back half way but don't move the half that still down.

9. Apply Adhesive

If you are doing a permanent installation this is when you will use your adhesive [make sure the room is well ventilated]. Take a notched spreader, apply adhesive, and then apply the adhesive to the sub floor. Follow instructions on the adhesive.

10. Unroll

Now slowly roll the carpet you rolled back earlier back into place. Smooth out any bumps and make sure you've got it lined up properly. If you were careful rolling it back all should be fine.

11. Repeat

Repeat the entire process above for the other side of the room now.

12. Carpet Roller

Now take your carpet roller [if you rented one] and run it across the entire carpet to get the adhesive to properly adhere all over the carpet.

13. Trim

Now is the time to use that sharp utility knife and trim away the excess on the edges around the outside of the room. Now is the time to clip any threads you see as well so that they don't start to unravel.

14. Clean Up

Clean away any excessive adhesive using a mild solvent. Follow the instructions provided by the manufacturer.

15. Connect The Dots

Or in this case connect the rooms. If you are laying outdoor carpet in more than one room use metal binder strips to cover the join.

That's it! If you followed these how to install outdoor carpet steps you should be an outdoor carpet layer pro by now! And think of all the money you saved not having to call in the pros. So what's your next project?

Improving your home and your life only at Home Improvement Idea : http://home-improvement-idea.blogspot.com

Wednesday, August 26, 2009

Give Your Room A Make Over With Sisal Rugs

by: John Murray

If you are looking to remodel and give your room a face lift by bringing it into the 21st century then you should have a look at Sisal rugs which are the perfect solution. They are affordable and will make your room beautiful. Why not give your room a make over with Sisal rugs.

The Agave sisalan cactus is used in the production of Sisal and it is found in brazil and Africa. Its long fine fibrous qualities allow it to be spun into a smooth but textured yarn. The fibers are tough and they are durable making Sisal rugs a versatile choice for any room and a perfect choice for high traffic areas.

Like wool it has natural anti static qualities and it is fire retardant and long wearing fibers. It's natural colors range from creamy white to pale yellow but may be dyed a variety of colors. The natural colors are beautiful on their own. Your Sisal rugs will also breath so they are great for regulating the humidity level in your room.

Sisal can also be blended with wool to may a hybrid type rug. It's an excellent match giving you the top qualities of both textile fibers.

Caring for your Sisal carpet is very similar to caring for an Oriental rug. If it is located in a high traffic area you should vacuum it daily. If it is in a lower traffic area then you can vacuum it less often. Stains needed to be acted on very quickly so as to not set into the carber. Do not soak these rugs as they will retain a water stain after cleaning. You need to purchase carpet cleaner that is specifically designed for Sisal rugs.

Sisal rugs have become so popular because they are so versatile and so durable. Most often they are used to as a cover or focal point on hardwood floors but they can be used over carpet, linoleum, or any other way you wish. They also work very well to hide wear or stains on the main carpet. Stains and wear usually occur in the high traffic areas which is also usually a great place to put a rug giving you a new look to your room while covering the wear.

There are many styles, sizes, shapes, colors, and textures in Sisal rugs. They can be used to give a room a facelift, a new focal point, hide wear. They look great in the center of a living room, near a fireplace, under a dining room table, or in a bathroom or bedroom.

An ancient technique with a very modern and contemporary style makes it a perfect choice for a modern contermporary room. If you are looking to create a warm and inviting environment the Sisal rugs can do that for you too.

Because they are easy to maintain and because they are so durable they are a great choice for heavy traffic areas. They can take quite a beating and still look fresh and new.

You'll find many home builders choosing Sisal rugs to accent the tile or hardwood. They are the favorite choice over Oriental or Persian rugs because they are so affordable and they fit so well into a contemporary room.

So whether you are building a new home and adding rugs or giving a room a facelift be sure to consider Sisal rugs. They are great value for the price!

Improving your home and your life only at Home Improvement Idea : http://home-improvement-idea.blogspot.com

How To Do A Carpet Repair

by: John Murray

It's almost inevitable that at some time you will need to do a carpet repair. There are two common types of carpet repairs that professionals will do for you or that you might do yourself. They are restretching and cut and plug. Find out how to do a carpet repair.

Restretching your carpet will give it a face lift removing the wrinkles. It will also extend the life of our carpet which would otherwise wear along the buckling. You will need a knee kicker which you can rent. The steps to restretching your carpet are as follows:

- Unfasten carpet from the walls remove baseboard


- Use your knee kick to kick the carpet tight in one direction


- Tack it down then kick the carpet in the other direction and tack it down.


- Any excess can be trimmed away


- Replace baseboard.

Cut and plug is used when small areas of a carpet have been stained, burned, or damaged some other way. The damaged piece is cut out and a piece of matching carpet is put in to replace it. Before you begin you will need matching carpet remnant , utility knife, empty can, utility knife, work gloves, single-sided carpet tape, painter's tape, marker, and scissors. Then follow these steps to do a cut and plug job.

1. Cut out the damaged area - put your gloves on to protect your hands, then use your empty can to cut a nice round cut out with your utility knife

2. Find a new piece of carpet that matches

3. Cut out to fit the area you've removed. Put your gloves on to protect your hands, then use your empty can to cut a nice round cut out with your utility knife - called the plug.

4. Use tape marked with an arrow to mark the direction of the carpet's nap on the piece you cut out. Then use another piece of tape to mark the nap just outside the cut out on the regular carpet.

5. Place the adhesive tape on the back of your new piece.

6. Remove the protective cover on the new cut out and align it correctly into the cut out.

7. Once you're sure everything fits well and aligns properly place the balance of your adhesive tape on the new piece.

8. Lay into place and apply firm pressure to assure the adhesive sticks.

9. Now you'll notice the new piece looks like it has a higher nap. That's because it isn't worn. You'll want to place a heavy stack of books or something similar on the repair to flatten the carpet. Leave there for at least a few days.

10. Remove the heavy objects and check for any loose or fraying edges. Trim away if necessary.

11. Check to make sure your adhesive has taken hold especially around the edges. If you require more now is the time to do it.

12. Sit back and relax. You've done a fine job.

That's it. Not too hard at all. Just follow these simple steps and you'll have your carpet repaired in no time.

Improving your home and your life only at Home Improvement Idea : http://home-improvement-idea.blogspot.com

Sunday, August 23, 2009

Bathroom Vanities - A New Vanity Set Can Complete Your Bathroom's Makeover!

Bathroom vanities are designed both to look good and to provide a practical function. Vanity sets come in all kinds of designs and can even be custom made to meet your particular requirements. For example, vanity makeup tables often come with storage compartments in the drawers for smaller items. A sink can be incorporated into the unit, and a base cabinet added underneath. Built-in bathroom vanity cabinets are great for saving space, and the extra storage space is ideal for keeping your counter top free from clutter!

A massive range of bathroom vanities can be found at online stores these days, which makes it easy for you to browse a range of different collections all from the comfort of your home. You'll soon notice that there's a huge choice of designs to choose from, to suit bathrooms of any theme. It helps if you have an idea of the look you're aiming for, be that period, country-style or contemporary, for example. Furniture style bathroom vanities are favorite choices among those wishing to bring a touch of elegance to their room. Decorative arched skirts or bun feet can be wonderful features, and can help your vanity table become an attractive focal point of your bathroom.

Think about whether you'd prefer stools or chairs as part of your vanity set, and remember to check out extras such as mirrors and lights. Other things to consider are the finish of your counter top. Vanity tops are made from durable and stylish materials, including marble and granite, so you're sure to find something to reflect your personal tastes. Wood bathroom vanities can be made from a variety of beautiful woods, including oak and maple, which can be left unfinished, glazed or painted. Attention to detail can make a big difference to the overall appearance of your bathroom, so be sure to choose a vanity unit that compliments your existing bathroom fixtures and cabinets.

If you're looking for a way to give your bathroom a stylish new image without too much effort, then a new vanity table could be the perfect solution!

Improving your home and your life only at Home Improvement Idea : http://home-improvement-idea.blogspot.com

Monday, August 10, 2009

Photovoltaic Panels - Harvest the Sun

by: Hans Dekker

There is a lot of energy in sunlight and that energy can be converted to electricity with photovoltaic panels. These panels are made up of several photovoltaic cells which are constructed of treated silicon which creates an electrical charge when exposed to sunshine.

Each photovoltaic cell produces just a small amount of electricity, so they are wired together into panels to provide enough current for common household appliances.

Photovoltaic cells come in three basic varieties. Monocrystalline are the most efficient but also the most expensive. They consist of a single crystal cut from an ingot of silicon.

Polycrystalline are the most common and slightly less efficient than monocrystalline. The silicon they are made from have several small crystals.

Amorphous cells are made by spreading the silicon on another material like stainless steel. These cells are cheap to produce but produce significantly less power than the other two types. This means that photovoltaic panels must be larger to produce the same amount of electricity.

Monocrystalline panels are slightly more efficient in low light conditions, but the difference is not significant. When choosing photovoltaic panels the most significant factor is the amount of available space. If you have lots of room you can install amorphous panels for less money.

As mentioned above, individual photovoltaic cells are wired together into panels which can produce more electricity. The panels themselves can be wired together in parallel or in series to produce a variety of currents suitable for almost any use.

The panels and arrays produce Direct Current (DC) power so it must be converted to Alternating Current (AC) for most purposes. This is accomplished with an inverter.

The AC current from the inverter can be used to power most household appliances. It can also be connected to the breaker box from the utility company so that solar electricity can act as a backup system to regular power supplies. The advantage of using both systems is that if there is any excess electricity produced by the sun it is fed back into the grid for a credit against the homeowner’s electricity bill.

About The Author

Hans Dekker is author of http://www.alternative-energy-guide.com/ come and profit from our energy saving knowledge.


Improving your home and your life only at Home Improvement Idea : http://home-improvement-idea.blogspot.com

Home Decorating: Where Are My Surfaces?

Many of you probably remember visiting your grandma's house as a child. I can still see how my grandmother had decorated her home. Every inch of surface and space was filled! The mantle, the kitchen counters, and of course the floor. She was a self-proclaimed pack-rat! When you walk into a home drowning in "stuff", it immediately bombards you and creates overwhelming vibes. So, how do we show every little nick knack we love, without going overboard?

I have a very strict rule with myself that every surface in my home should be clean and almost completely cleared. I enjoy showing off my candles, vases, and other items. However, I have learned when it becomes too much. As a teenager I had covered every inch of my dressers and desk with decorations. My bedroom had become more of a showplace then a home. My decorations were nicely placed as sort of a retail window display, but I could never find a place to set something down.. Which of course meant the floor was the only other option. As you can imagine, my old room never stayed clean for very long. Years later, when I got my own place, I was finally sick of my beautiful items appearing more as clutter then as strategically placed home decorations. I cleared my surfaces and started fresh!

I now place only a few of my "can't live without" decor pieces on my desk, dressers, dining table, and kitchen counters. The rest have been stored away. If you don't think you can part with your treasures, remember these great benefits to the "minimal design":

1. Once you have items stored away, you can replace which items you show off each season, which will give your home a new and fresh look. Mix and match and it will look as if you redecorate every month, just by switching which items you have out!

2. When you place a ton of distinct and unique items together, they each lose their charm and eye-catching appeal. If you want people to notice your great design sense and adorable treasures, make sure they can actually see them amongst every other item you have in your home.

3. Your home will appear more spacious and much tidier with this method. Plus, now you can see that beautiful wood table you've been covering up!

4. You can actually set stuff down! And to make sure you don't get in the habit of making a mess, set designated decorative baskets for items such as car keys.

It is easy to get caught up with buying every little nick knack you can find and covering your dressers with jewelry boxes and the dozens of perfume bottles you simply have to keep. But, keep in mind that a cluttered home can infringe on your efficiency as a home business owner, full time parent, or simply a person who needs to find their shoes! But remember, you don't have to throw these items out. Spend some time today removing half of the things you have displayed on your surfaces. Neatly store them in an easy access linen closet for future use. In a few months, when you feel like you need a change, replace the decorations with your stored items and voila! It will look as if you just redecorated. By using the "minimal design" you will be surprised out how much better your home will look and feel!

Improving your home and your life only at Home Improvement Idea : http://home-improvement-idea.blogspot.com

Tuesday, July 21, 2009

5 Must Haves For Setting Up A Basement Bar

by: Craig Rowe

When setting up a basement bar there are some must have items you must have around or your basement bar won’t really be a bar but just a basement pretending to be. Of course, there are some extras like a jukebox and pool table that will really set the bar off. However, consider the following 5 must haves in order to set up your very own basement bar to enjoy a night with your friends, parties, game days and then add the extras when you can afford to.

Must Have #1 A Basement

This might seem obvious, but to have the best basement bar ever you really need a traditional basement. There are many benefits to this that include being on a completely different level than the rest of the house so noise won’t be transmitted and bother those above you. Of course, you can make a basement bar in whatever space you call the basement, but a true basement bar needs a basement.

Must Have #2 A Bar

Ok, obvious requirement number two is a bar. A basement bar needs a bar that is set up to serve beer and give the appearance that your basement bar is really authentic. You can buy a ready made bar, hire a carpenter to build you one, or give it a go yourself by buying the lumber and downloading step by step instructions from the Internet. As long as you have a basement and a bar your basement bar just needs some accessories.

Must Have #3 A Kegerator

A kegeraotr is a refrigerated keg that will keep your beer cold at all times and be ready to serve anytime the basement bar is open. You don’t want to have to buy six packs and litter your bar with bottled beer when you can serve beer straight from the keg. Keg beer is special and will make your basement bar even more so.

Must Have #4 A Big TV

No, you don’t have to have the biggest screen television on the market, but it will help. Buy the largest screen television you can afford for your basement bar, or one that fits the space well if your basement is really small. This will allow for great game watching like the Superbowl, Basketball National Championship, and other great games.

Must Have #5 Seating

This might seem generic, but it really is a must have for your basement bar. If your friends are joining you for a night of poker or Monday night Football they need a place to sit back and relax while drinking some of your keg beer. So, be sure to have some bar stools around the bar as well as comfy couches and chairs surrounding the TV, with your poker table nearby so there is plenty of seating wherever the action is taking place.

About The Author

Craig Rowe

Find more food, drink and spirit tips and articles at http://www.SearchArticles.net/food-drink.cfm. For drink recipes, visit: http://www.divinerecipes.com/drink-recipes.cfm.

Improving your home and your life only at Home Improvement Idea : http://home-improvement-idea.blogspot.com

DIY Plumbing Repairs - You Have Homeowners Insurance, Use It!

by: Ray Breitenbach

Since most home owners insurance policies don't cover the cost of repairs few people think to check with them when plumbing problems occur. Although they may not cover the repair, they will usually cover the value of damaged property including cleaning up after the repair. The scope of this type of project is typically not a diy plumbing repair project so you will want to find any way you can to help pay for it.

A few years ago I had the misfortune of finding water seeping through a wall in my basement one spring. First this was blamed on a very wet season. Next, when dry weather came around and the leak was still there a basement waterproofing contractor was called in. It was no suprise when this contractor informed me that I had ground water and needed their expensive services. Since the company had a vested interest in me believing this they did not seem to feel the need to offer any other possible explanation. Based on the fact that the remaining 95% of the basement walls had no such problem a third opinion was in order.

Based on the proximity of the leak to the primary kitchen drain pipes a third contractor was called. After a short examination, the plumbing contractor was able to determine that the kitchen drain pipe was leaking (not where we could access it easily of course but behind a cinder block wall under a concrete slab).

The plumbing contractor then made an unexpected suggestion - call my insurance company before starting the repair. That was when he explained that the company would not pay for the repair, but they would pay for the cost of jack hammering up my living room, hall, and/or office floor to find the leak and cleaning up afterwards. He was also able to suggest an alternative solution that was cleaner and much less expensive and present it to the insurance company.

Two repair scenarios were proposed.

The first project would involved having the plumbing contractor find the leak under the living room slab, repair the drain pipe, and then replace the concrete and flooring to clean up after the project. As would be expected the estimate for this repair was on the high side ($4000+ by the time all the cleanup work would have been completed).

The second repair was considerably less intrusive - they would cap off the existing drain line (kitchen only) and re-route it through the joist's in the basement and re-connect it to the main line outside the house. The only "heavy" work in this proposal was cutting a 6 inch hole in the exterior wall and digging a trench to run the new pipe to be reconnected. The remainder of the work amounted to a fairly simple plumbing repair. The net cost for this repair was about half the first proposal

With both of these proposals on hand, the insurance company had no problem in justifying payment for the FULL SECOND OPTION (less deductable of course). The insurance company saved money, the home owner saved money, and the repair was accomplished within 2 days with a minimum of cleanup required.

This entire project demonstrated the value of a good plumbing contractor. They were able to quickly identify the problem, propose multiple solutions, and help justify the payment by the insurance company.

This repair also demonstrated the value of a insurance company. The insurance company was willing to accept and pay for an alternative solution as well as inform the home owner of all the expenses that should be recorded for reimbursement.

About The Author

Ray Breitenbach writes for Simple Home Repairs - http://www.simplehomerepairs.com. Please visit for more information on how to perform you own basic home repairs.

handyman@simplehomerepairs.com

Improving your home and your life only at Home Improvement Idea : http://home-improvement-idea.blogspot.com

Home Painting Tips

by: D. David Dugan

Remember, everyone starts as a beginner at painting. Just because you have never painted a house doesn’t mean you shouldn’t give it a try. The money you save by painting your own house is money you can put into other home improvements. It can also be a fun thing for the whole family to do.

Now we need to choose the colors we want to paint the house. There is a really cool tool online that you can use. http://www.benjaminmoore.com/wrapper_pcv.asp?L=owner&K=intproj&N=intproj Click let’s paint. Choose exterior or the interior options. Choose the project closest to yours. Get started and you will soon know what color you want to paint your house and you’ll have a vision of what it is going to look like when you’re finished.

Here are some of the basics. Of course the first thing you need to do is wash down the walls of your house. A pressure washer can be rented at almost any rental yard and is the best way to do that. Now go around with a scraper and remove all loose paint and chipped areas. You don’t have to scrape the entire wall, but any areas where the surface is not flat can cause you problems as you paint your house.

Next, figure out your square footage so you can determine the amount of paint you will need to buy. Buy your paint in 5-gallon pails, rather than gallons to save more money.

Talk to the helper at your local paint store and tell him about your project. They can help you decide on how many brushes and rollers and other items you will need. You can buy natural or synthetic bristles for oil based paints, but only use synthetic bristles with latex paint. The same rule applies to rollers. Good rollers can run you around $7, but buy high-quality paintbrushes. A good brush for cutting in around edges will run you about $30.

Make sure you purchased some painter’s tape. It’s blue tape that comes in different widths and is easy to remove without messing up your paint job. That brings us to preparation. Tape off all areas you don’t wish to get this color of paint on. If there are large areas to cover, make sure you pick up some rolls of plastic. You can tape the edges of the plastic down over whatever you need to cover.

Don’t paint out of the paint cans. First reason is that leaving the paint can open will dry out the paint and make it difficult to apply. Another reason is that your brush or roller picks up dirt and foreign objects, which will end up in your paint and may even change the color as you go along.

Do all of your cutting or trimming in before you paint the walls. Use a 4” brush and with a smooth stroke guide it around the edges where you taped off. Make sure you have plenty of paint on your brush. The biggest mistake people make is trying to stretch the paint too far. Keep drips cleaned up as you go with a small rag. Remember you will be rolling up to the edge of your cut, so don’t worry about that, just make sure you cover the edges well.

Start on the edges of your walls and work your way toward the middle. Most people don’t do this and problems can result. If you start and new can of paint in the middle of the wall and there is any difference in the color at all, it will show up there more than it would on the edges. So with each new can of paint you open, start at the edges first.

Dip your roller in water (for Latex) or solvent (for oil-based paint), before you start. Whether you use a pan or a 5-gallon bucket with a screen, make sure you roll it out a little to make sure it isn’t dripping. You don’t need to go all the way from the top to the bottom as you paint. Do what you can reach.

Apply the paint in a Y or an N pattern, then apply paint in columns up and down smoothing out all the edges or ridges as you go. Again don’t try to stretch the paint out, make sure you have enough paint on your roller to give it a good coat. If you are applying more than one coat, make sure the first coat is completely dry before applying a new coat of paint.

Corners are a difficult part to learn to paint. If you aren’t careful, this is where you will see paint drips later. Get as close to corners as you can, but don’t scrape the roller against the corner. That will cause drips. If you are unsure, have a paintbrush handy to smooth out drips. That is also a good idea overall. Keep a paintbrush ready for taking care of any drips or ridges you leave behind. Doing this as you go is much easier than trying to fix it after it’s dry or partially dry.

Using tray liners for your paint trays will save you a lot of time at cleanup. Soak your brushes when done for awhile and they will also be easier to clean. For water based paint, soak in water and for oil based paint soak them in solvent.

I hope some of these tips have been helpful to you. Have confidence that you can do this job yourself. You will appreciate and enjoy it much more knowing that you or you and your family completed the job rather than hiring someone else to do it.

About The Author

D. David Dugan has a website, http://homeimprovement.divinfo.com/ to help homeowners find all the information they need about remodeling, home repair, building decks and carports, room additions, and more. He also actively participates in a forum at http://forum.dugancom.com/ that can help you with computer problems you may be having.


Improving your home and your life only at Home Improvement Idea : http://home-improvement-idea.blogspot.com